Now I know some of you may be disappointed so far but remember this is a beginners class. Were here to help people new to digi-scrap-booking and those new to Paint Shop Pro.
Let’s make another paper. This is called an embossed paper.
So let’s open Paint Shop Pro. Remember I’m using X so if my icons look a little different don’t worry just look around.
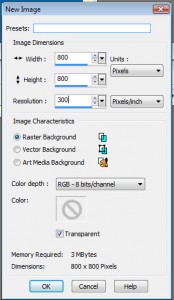
1. Select New Image ![]() Or press Ctrl+N.
Or press Ctrl+N.
Width and height 800 Pixels
Resolution 300 Pixels per Inch
Raster background
Color marked to Transparent
Select Ok
2. Open your palette you created in Lesson 1. ![]() Or press Ctrl+O.
Or press Ctrl+O.
3. Select your dropper tool.![]() Or press E.
Or press E.
I’m going to select the last color #ff4500.
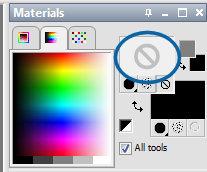
You should see the foreground box in your Materials area turn #0a64a4.
4. Select the flood fill tool. ![]() Or press F.
Or press F.
Now fill your new 8×8 image.
5. Right click on your layer palette and select duplicate. On the top layer set the Blend Mode of the duplicated layer to Luminance (Legacy).
6. Now when I created this palette I thought summer. So I want to add summer objects to my paper. So I’m going to do a simple google image search on flip flops, pails and shovels. So you will find that when you search “flip flop” you will get 7,470,000 results but 2/3’s of them I can’t use. I need something that’s more like a coloring book. A black and white vector image. So the handy new options panel that google added on the left side has the awesome option Line Drawing.
Which reduced the number of images to 87,900 results. But I see some great potential images i want to use. I found two that i liked i just right clicked and selected save as right on the page.
7. Back to PSP. Open your new embossing objects. ![]() Or press Ctrl+O.
Or press Ctrl+O.
8. Now since my two objects are .jpgs I need to promote background layer so I’m able to make them into transparent objects. You can either right click on the layer in your layers palette and select Promote Background layer.
Or Layers –> Promote Background Layer
9. ![]() Using the wand tool you need to select all the white parts of our embossing objects and hit delete.Leaving only the black lines behind.
Using the wand tool you need to select all the white parts of our embossing objects and hit delete.Leaving only the black lines behind.
10. So now on my first image the flip flops using the ![]() select just the lines. Press Shift to add more lines that need to be added so that everything has the march ants on them.
select just the lines. Press Shift to add more lines that need to be added so that everything has the march ants on them.
11. Press Ctrl+C to copy.
12. Back to our paper. Select Layers –> New Raster Layers (layer 3 if your counting)
13. While on your new blank layer press Ctrl+E which is paste as new selection. Randomly place flip flops.
14. Continue steps 8 threw 13 with your second object which was a pail and shovel for me.
So right now my paper looks like this.. Blah
15. Using the wand ![]() select all the negative parts not the line drawings and make sure your on the top level. Remember press Shift to add more parts, or Ctrl to remove something you’ve clicked by mistake.
select all the negative parts not the line drawings and make sure your on the top level. Remember press Shift to add more parts, or Ctrl to remove something you’ve clicked by mistake.
16. Now select your 2nd layer the layer that we changed the blend mode to Luminance.
17. Select Effects –> 3d Effects –> Drop Shadow with these settings.
Vertical:3
Horizontal:3
Opacity: 100
Blur:5
Color: White
18. Now select drop shadow again. Effects –> 3d Effects –> Drop Shadow with these settings.
Vertical:-3
Horizontal:-3
Opacity: 100
Blur:5
Color: Black
19. Now right click on the top level the one that has all the flip flops and pail (on the layer palette) and delete the layer. (Back to 2 if were counting.)
We still have something like this. Still kinda blah.
20. But lower the opacity to 19, and we have a cute embossed summer themed paper.


